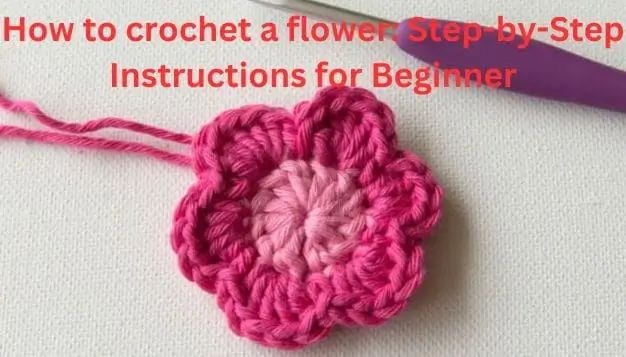
Crocheting is a timeless and rewarding craft that allows individuals to create beautiful and personalized items. One popular and versatile project for both beginners and experienced crocheters alike is the crochet flower. Whether you’re looking to embellish your accessories, home decor, or gift items, learning how to crochet a flower is a delightful skill to acquire.
In this comprehensive guide, we’ll take you through each step, providing clear instructions and tips to help you create a stunning crochet flower.
Materials Needed
Before you embark on your crochet flower journey, gather the following materials:
- Yarn: Choose a yarn color of your preference, preferably a lightweight yarn suitable for the flower size you desire.
- Crochet Hook: Select an appropriate crochet hook size based on the yarn thickness. For beginners, a medium-sized hook (G or H) is recommended.
- Scissors
- Yarn Needle: Used for weaving in ends and assembling the flower.
Step 1: Make a Slip Knot
To start your crochet flower, create a slip knot by making a loop with the yarn, pulling the working end through, and tightening the loop around your hook.
Step 2: Chain Stitch (Ch)
Begin with a foundation chain. The number of chains will determine the size of your flower. For a standard small flower, make a chain of 4-6 stitches.
Step 3: Form a Ring
Join the last chain stitch to the first with a slip stitch (sl st) to form a ring. This ring will be the center of your flower.
Step 4: First Round – Petal Base
Chain 3 (counts as the first double crochet) and work a set of double crochets (dc) into the ring. The number of double crochets will determine the fullness of the petals. For a basic flower, aim for 8-12 double crochets.
Step 5: Second Round – Petal Edges
Chain 3, skip one stitch, and single crochet (sc) into the next stitch. Repeat the pattern between asterisks until you complete the round. Slip stitch to the top of the first chain 3 to finish the round.
Step 6: Repeat and Build Petals
Repeat Steps 4 and 5 until you achieve the desired number of petals. Adjust the size of your flower by adding or subtracting rounds.
Step 7: Fasten Off
Cut the yarn, leaving a tail, and pull it through the loop on your hook. Tighten to secure. Use a yarn needle to weave in any loose ends.
Step 8: Finishing Touches
If you’ve made multiple flower components, stack them and secure with a yarn needle. You can also add a button, bead, or contrasting yarn to the center for a decorative touch.
Tips for Success
- Experiment with Yarn and Hook Size: Different combinations of yarn weight and hook size will produce varied results. Play around to find the combination that suits your vision.
- Practice Stitch Consistency: Consistent tension and stitch size contribute to a polished and professional-looking crochet flower. Practice maintaining even tension as you crochet.
- Explore Color Combinations: Get creative with color combinations to personalize your flowers. Experiment with solid colors, variegated yarns, or ombre effects.
- Embellish and Customize: Consider adding leaves, vines, or other embellishments to enhance your crochet flower. This allows you to personalize your creation and make it unique.
Conclusion
Crocheting a flower is a delightful and accessible project for crafters of all levels. With this step-by-step guide, you’ve learned the fundamental techniques to create a beautiful crochet flower. As you gain confidence, don’t hesitate to experiment with different yarns, colors, and sizes to unlock endless creative possibilities. Happy crocheting.

